How To Debug Mobile Traffic
Recently we faced an "interesting" problem: We received seemingly random reports for failing logins to our customer's website. Only after a lot of experimenting we could narrow the problem down to specific mobile devices. This forced us to go a level deeper and investigate the problem on the protocol level.
While I do know my share of TCP and HTTP, I am not hacking into mobile traffic on a day-to-day basis. So I had to put on my hacker-hat and start some research on how to intercept HTTP packets coming from my phone. As usual it took quite some time and experiments to follow breadcrumbs on the internet, sort out the obsolete/expired information, and put together all the puzzle pieces to a complete working end-to-end picture. To hopefully save you time, this post sums up my findings and describes possible ways and necessary steps to view and analyse your mobile traffic (valid at the time of this writing in April 2020).
Possible Options To View Mobile Traffic
The biggest challenge for intercepting any traffic is end to end encryption (which hopefully everyone is using by now, except maybe TikTok ). In order to decrypt HTTPS traffic, one must be in possession of the correct key, which ultimately only the server knows (also hopefully).
There are three places where we can tap into the mobile traffic: on the client, where the traffic is encrypted, on the server, where the traffic is decrypted, and/or on the line in between:

1. Intercept traffic on the mobile client
In this case the traffic gets captured right where it is generated, but before it gets encrypted. This requires installing an app (e.g. HTTP Canary ) on the phone, which will then hook into the phone's network stack. There are a few downsides to this approach:
-
Most apps require root access in order to capture traffic
-
The traffic will be captured on the phone, thus you need to run your analysis directly on the phone or send the recorded data off your phone before being able to analyse it.
-
It is rather invasive as the application messes with your network stack. Also, obviously you need to really, really trust the application's author.
2. Intercept traffic on the server
We could instead intercept the traffic on the server. However, for this we need to tap into the request processing pipeline after the request content is decrypted. This also comes with some downsides:
-
Unless we also put special filters in place, this will affect every request, not only the specific requests we want to inspect more closely. This may cause several concerns, namely performance and legal (GDPR).
-
Making debugging modifications on a production system might not be to everyone's liking.
-
It may open the server up for additional vulnerabilities or have unintended side-effects
3. Intercept traffic on the line
Last but not least we could listen in on the transport channel. However, traffic on the transport channel is encrypted so we can't just easily check network packets. Instead, we must perform what is known as a Man-In-The-Middle (MITM) attack by inserting our own HTTP proxy, presenting our own server certificate to the client and log the traffic before re-encrypting and relaying the request to the original server.
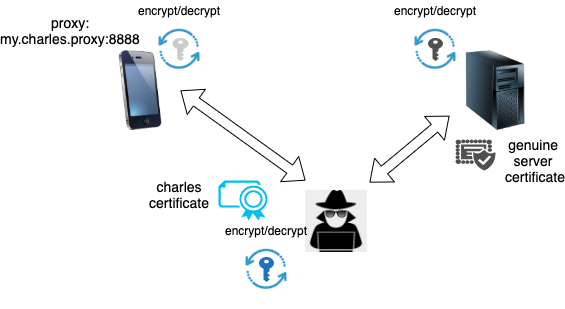
This is our weapon of choice: it captures real traffic on the line, affects only the specific device who's traffic we want to inspect, and does not require any modifications of the server software and/or -configuration.
In the following we take a look at the tools and configurations we can use in order to set up such a proxy-based MITM configuration (I will be using a Mac for this). For this example we need:
- Charles Web Debugging Proxy ( download here )
- GenyMotion Desktop Android Emulator ( download here )
Install Tools
Charles Web Debugging Proxy
Installing Charles Proxy is straightforward. Just follow their installation instructions
Note: MacOS users can use Homebrew to install Charles Web Debugging Proxy
brew cask install charles
GenyMotion Desktop
GenyMotion is a great Android emulator, based on VirtualBox. Installation of GenyMotion is also rather straightforward and will not be covered here. Please follow the installation steps as described in their documentation.
Note: MacOS users can use Homebrew to install VirtualBox and GenyMotion
brew cask install virtualbox genymotion
Initial testing our Setup
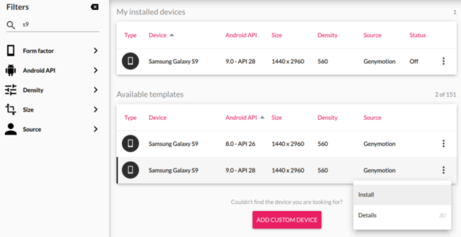
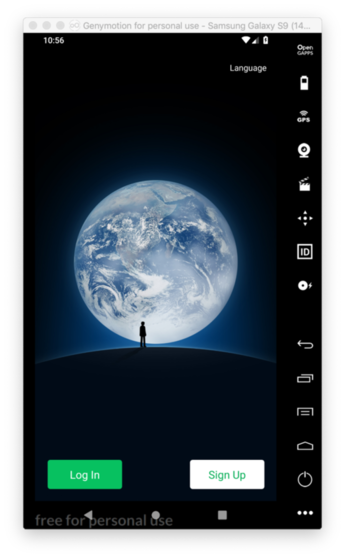
Now that we have both tools installed, it's time to launch our emulated Android instance and test our proxy setup. For this example, I choose "Samsung Galaxy S9" template to create my instance in GenyMotion, leaving all settings at their default:
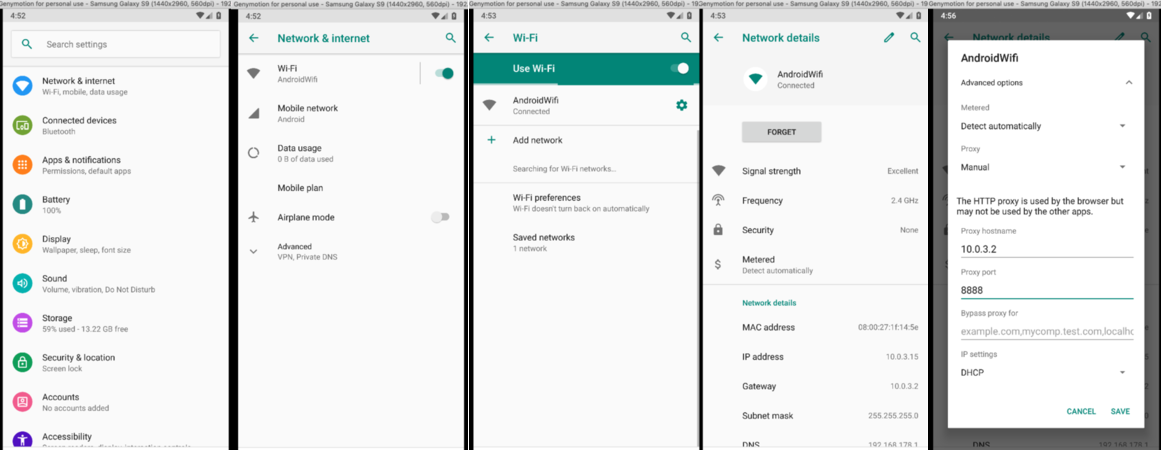
Once installed, we can start the instance and change the network configuration to use our proxy. The emulator routes all requests through the host network. Assuming we are running the GenyMotion and Charles on the same machine, the gateway IP address points to our machine. In "network details" check the IP address of "gateway". This is the proxy IP address we need to set, by default Charles is listening on port 8888:
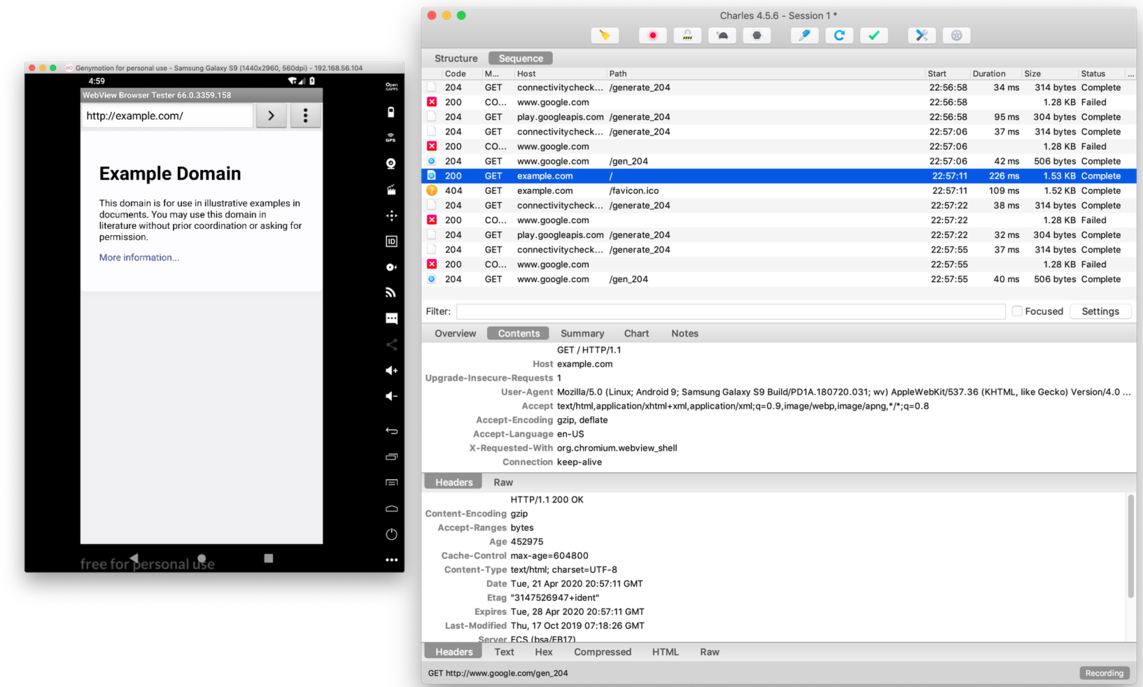
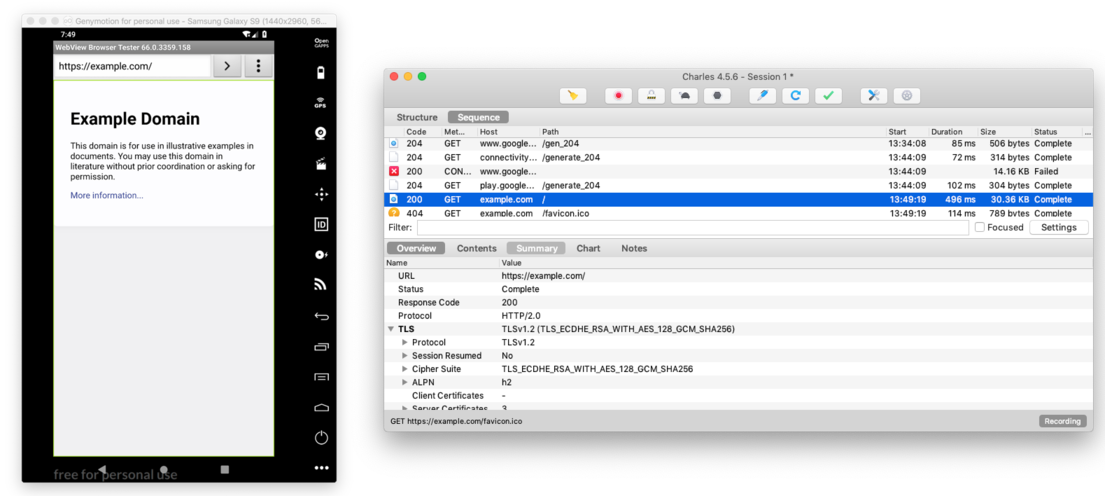
Finally we can open the browser and open http://example.com/. We should see this traffic in Charles:
Install CA Certificate on Mobile Devices
Before we can intercept HTTPS traffic, we need to "spoof" the server's certificate. Charles automatically generates a server certificate on-the-fly for each target server to intercept. For this to work though, we need to get our device to trust Charles Proxy's certificate authority. Otherwise it will rightfully reject the spoofed server certificate.
There are a bunch of instructions around how to debug Mobile traffic with Charles Proxy and install the necessary CA certificate on the devices. While the section about iOS is quite accurate and easy to follow, the Android documentation is rather thin. Starting with Android 7, user-installed CA certificates will not be trusted by default, which makes it impossible for Charles Proxy to proxy HTTPS traffic.
For Android >=7 you have only two choices if the application you want to test is not under your control:
a) decompile an existing APK , change the "Network Security Configuration" and recompile
b) on rooted devices, install the CA certificate into the trusted system CA location
The steps below show in detail how to do b) with GenyMotion Android Emulator as an example.
IMPORTANT
Make sure to perform this step before doing any webrequests on your device! This is because some sites use "certificate pinning" and once you hit the website for the first time, the OS caches the certificate key for this site, which will cause the browser to reject Charles Proxy's generated certificates!
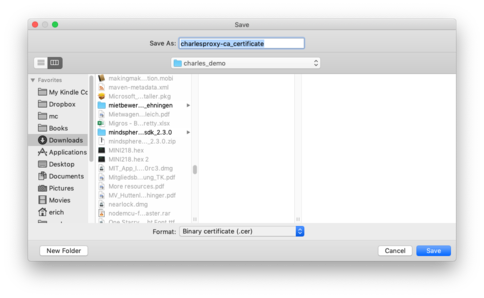
1. Download Charles Proxy CA certificate
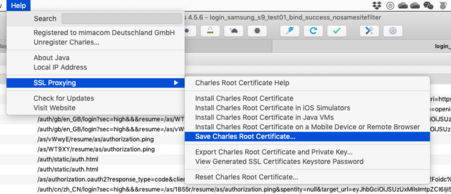
Select format "Binary Certificate (.cer)" filetype and save to filename "charlesproxy-ca_certificate":
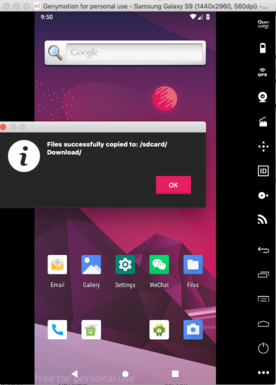
2. Install certificate to GenyMotion instance
a) Drag & Drop the certificate file onto the GenyMotion instance.
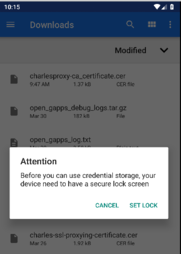
b) Open "Files" app and click on the certificate to install it
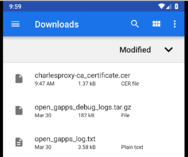
Click on the certificate file to install it. Enter a descriptive name and click OK:

This will install the certificate into the "User Certificates".
If you haven't yet, the system will require you to configure a security PIN first:
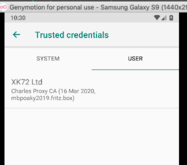
you will then find the certificate in
"Settings" -> "Security & Location" -> "Enccryption & Credentials" - "Trusted credentials" -> "User"
3. Copy user certificate to trusted system CA location
Using the "adb" tool, log into your device instance. For GenyMotion, you can use the following command:
$ /Applications/Genymotion.app/Contents/MacOS/tools/adb shell
Inside the shell, run the following commands:
vbox86p:/ # su
:/ # ls -la /data/misc/user/0/cacerts-added
# see all user-installed certificates
:/# ls -la /data/misc/user/0/cacerts-added
total 16
drwxr-xr-x 2 system system    4096 2020-03-26 09:56 .
drwxr-x--- 3 system everybody 4096 2020-03-26 09:03 ..
-rw-r--r-- 1 system system    1366 2020-03-26 09:56 b385198d.0
This lists your installed user-certificates. The filename is the hash-value of the certificate ( see this blog for more details).
Now we need to copy this certificate over to the trusted system location:
# remount system as read/write
:/# mount -o rw,remount /system
# copy charles certificate to system trusted root ca certificates
:/# cp -f /data/misc/user/0/cacerts-added/b385198d.0 /system/etc/security/cacerts
E voilà! Now you can see the certificate in your trusted system certificate store:
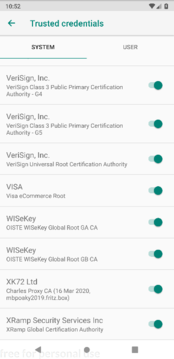
With the Charles CA Certificate trusted by the system, we now can successfully call HTTPS endpoints and see the contents of those requests in Charles:
Finally we can capture the traffic between our mobile device and the server!
Running ARM Apps on x86 Emulator
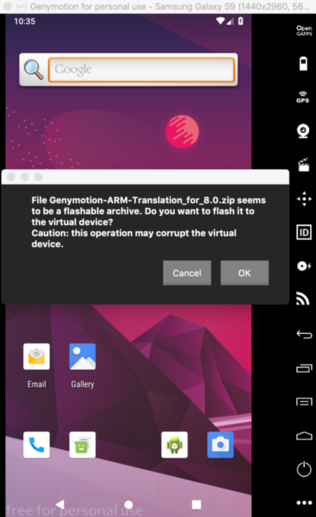
Of course the built-in browser is not sufficient and we might want to trace traffic caused by a specific app. Here's the catch: a lot of apps are compiled for the ARM processor architecture, but our emulator is running on x86. The solution is to install an "ARM Translator" which you can find here. There's no explicit translator for Android >=9 yet, but I used the one for 8, which works fine. Download the package for your Android version and drag&drop it onto your emulator window. A dialog will pop up asking you to install the package. Confirm & restart the emulator instance as instructed:
Now we can install & run ARM packages on our x86 emulator. One source for apk packages is apkmirror. As an example lets install WeChat, a popular IM client in China. I downloaded the suitable apk (armeabi-v7a in our case) and drag&drop it again onto our emulator. The package will be installed and started automatically and we've got our app under test successfully up & running:
Final Notes & Tips
Now we've got all the ingredients for a successful debugging session. Here are some tips that hopefully make your hacking life easier:
- With some GenyMotion templates I had troubles entering text via keyboard. This seems to depend on the templates. With the Samsung Galaxy S9 template I had the least problems.
- Ditto for performance. Some templates are dead slow, some are ok. Again, the Samsung Galaxy S9 template seems to work fine.
- Touch Gestures in GenyMotion can be simulated via left-mouseclick (e.g. press long in a textbox to bring up copy&paste context menu)
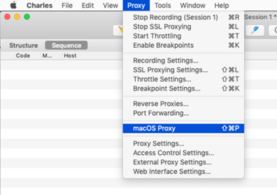
- By default, Charles automatically registers itself as system proxy. You may want to turn this off:
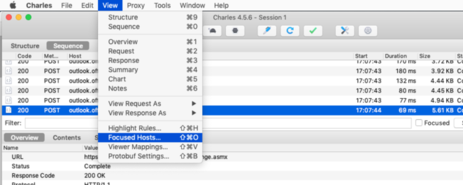
- You will often find requests to a ton of different hosts in Charles. One way to filter this is to use the "Focused Hosts" feature:
Being able to see the actual traffic between a specific mobile app and a server without hooking into the server application and being able to test different mobile OS versions/devices turned out to be a huge lifesaver! The above hopefully gave you enough information in one single place to set up your own environment to get started. Happy debugging!