Introduction to Spring Boot
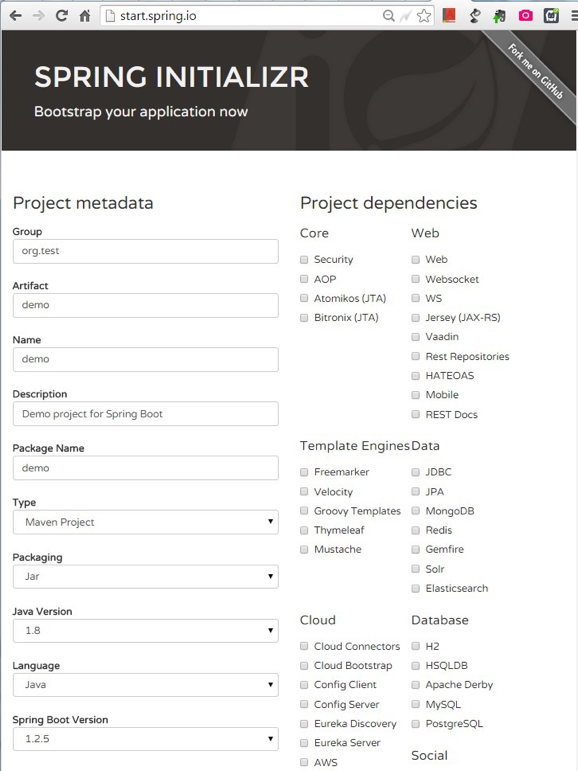
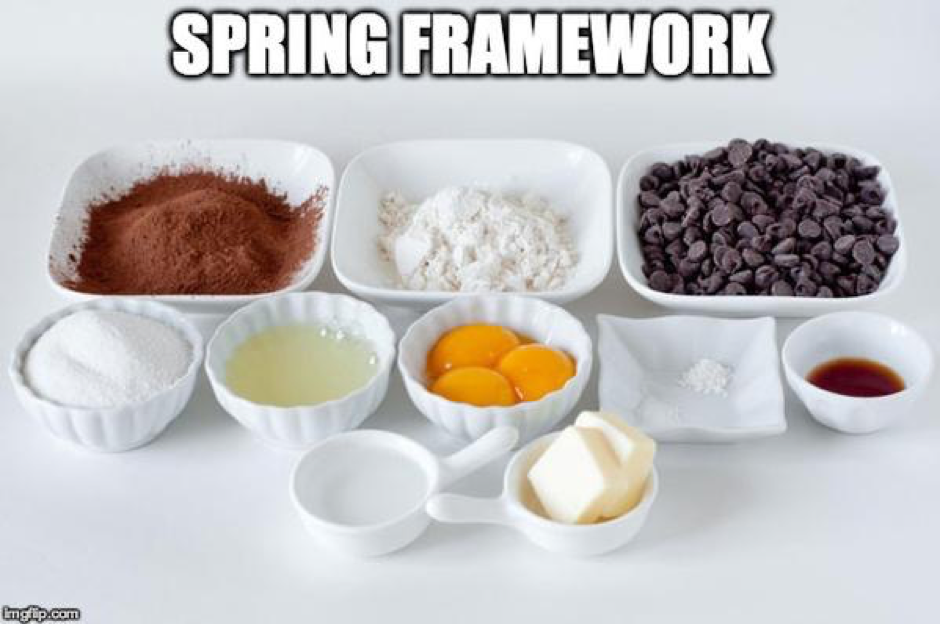
Some months ago I attended the Spring IO 2015 event hosted in Barcelona. There were quite a big list of interesting talks and workshops regarding the main new features of the Spring ecosystem, which includes a new version of Spring, Spring Cloud, micro-services architecture, WebSockets, etc. Something that kept my attention was that all or almost all of the examples created for the talks and workshops were created with the amazing tool created by Pivotal and released last year called Spring Boot. Before Spring Boot, creating Spring-based application sometimes was a painful process in terms of configuration for those with a very basic knowledge of the Spring framework (and even for some experienced developers). Now with Spring Boot is possible to build production-ready Spring applications very easily thanks to its convention over configuration mechanism that allows Spring Boot preconfigure applications in an opinionated way whenever possible. Creating a new Spring application is as easy as open in your browser the initializer page, enter the metadata for your project (typical Maven/Gradle attributes, language, version, etc), select the dependencies that your project needs such as security, web, JPA, cloud technologies and click in “Generate Project”.  This will generate a new project that you can save in your machine, open it in your favorite IDE, build it and run it without taking care of any initial configuration. It will just run in any machine with a JVM installed on it if you selected the “Jar” packaging mode in the creation of the project, which adds an embedded Tomcat server inside the created artifact. You can also create the application as a WAR file and deploy it in any server of your choice, but as Josh Long said in one of his talks in the Spring IO “it is better to make Jar, not War”. In this way it is much easier build a micro-services architecture for instance, imagine how hard would be creating the infrastructure for 50 micro-services if every of them should run in its own server instance. It is also possible to create applications with your favorite IDE if it has integration with the Spring Initializr, which IntelliJ, Eclipse and NetBeans have; or even you can create them from a terminal with the CLI provided by Spring, but the initial options are less configurable. It is important to mention that Spring Boot is not about code generation, it is about bootstrapping applications in an opinionated way with a set of default settings, that can be overridden afterwards in an easy way through property files or JavaConfig, there is no need of XML configuration at all (although it can still be used if you wish). Some days ago I saw that Phil Webb twitted a post saying that Spring Boot was the framework for Spring framework (something which actually is true) together with these images that explains very well the main concept of Spring Boot:
 I think it is an excellent analogy about what Spring and Spring Boot are. With Spring framework you have a lot of great ingredients to make a yummy cake (or Spring application), and with Spring Boot you have a cook that will look the ingredients that you have selected and based on that it will cook a cake for you. If you want to change the flavor, color or shape of the cake you can do it and Spring Boot will give you a new cake. All of this auto-configuration is driven by the concept of starters and conditional annotations that Spring Boot provides. Starters are a set of dependency descriptors that you can use in your application just as an only dependency, in this way you can add all the related dependencies involved in a technology with a minimal specification. For instance, if you want to create a web application you just have to include in your pom.xml file this dependency:
<dependency>
      <groupId>org.springframework.boot</groupId>
      <artifactId>spring-boot-starter-web</artifactId>
</dependency>
And this dependency will automatically bring to your project all the needed dependencies to create a Spring web application. The auto-configuration part of Spring Boot can be achieved thanks to the conditionals annotations that can be used in configuration classes. These conditional annotations will activate different configurations depending on the classes, beans, properties or resources that are detected in the classpath. In this way it is possible to auto configure default databases, JMS queues, properties and much more without the explicit definition of these resources from part of the developer. The available annotations that can be used to achieve this behavior are:
- Class conditions: @ConditionalOnClass and @ConditionalOnMissingClass.
- Bean conditions: @ConditionalOnBean and @ConditionalOnMissingBean.
- Property condition: @ConditionalOnProperty.
- Resource condition: @ConditionalOnResource.
- Web application conditions: @ConditionalOnWebApplication and @ConditionalOnNotWebApplication.
- SpEL expression condition: @ConditionalOnExpression.
Combining both starters and conditional annotations you can create your own starters with auto-configuration classes. This may be helpful if your company creates shared libraries or a lot of projects with a similar configuration. You can see the complete list of starters provided by Spring here and the reference section to create your own auto-configuration here. But Spring Boot it is not just about bootstrapping and auto-configuration of Spring applications. There are some cool features that will ease the monitoring of our application. If you add the spring-boot-starter-actuator to your POM file or you select “Actuator” in the Initializr page, you will get automatically some useful endpoints that you can access via HTTP to monitor your application. This is the list of the available endpoints extracted from the Spring documentation:
- /autoconfig: Displays an auto-configuration report showing all auto-configuration candidates and the reason why they ‘were’ or ‘were not’
- /beans: Displays a complete list of all the Spring beans in your application.
- /configprops: Displays a collated list of all @ConfigurationProperties.
- /dump: Performs a thread dump.
- /env: Exposes properties from Spring’s ConfigurableEnvironment.
- /health: Shows application health information (a simple ‘status’ when accessed over an unauthenticated connection or full message details when authenticated).
- /info: Displays arbitrary application info.
- /metrics: Shows ‘metrics’ information for the current application.
- /mappings: Displays a collated list of all @RequestMapping paths.
- /shutdown: Allows the application to be gracefully shutdown (not enabled by default).
- /trace: Displays trace information (by default the last few HTTP requests).
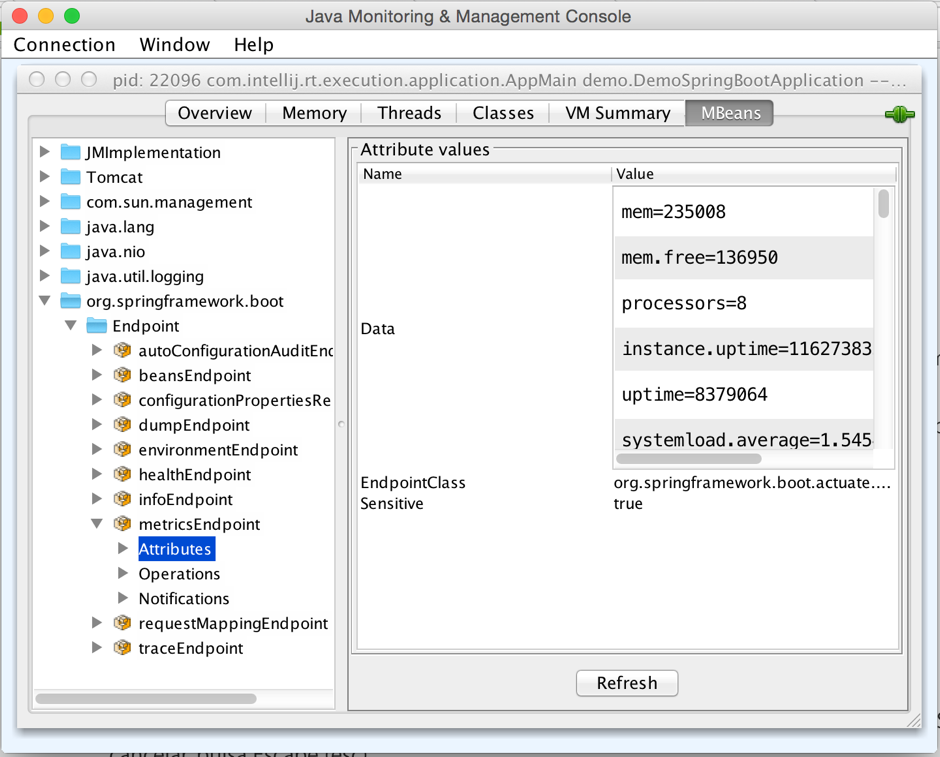
All of these endpoints will return JSON data that you can scrape and make something useful of it, or instead of that they just can check these endpoints with the Java console as these Spring Boot integrates with JMX.  Another way of monitoring our Spring Boot applications is through an integrated remote shell called CRaSH. To have this integrated shell in your application you have to add to your POM file the dependency spring-boot-starter-remote-shell. Once this dependency has been added you can connect to your application typing in your terminal ssh -p 2000 user@localhost and the password to be used you can see it in the log of the application when it is started:
  Once connected to the remote shell you can see the available commands you can execute typing ‘help’. You will see commands to access to the same information that is available through the endpoints plus some commands more. It is also possible to write your own custom commands in Groovy or Java languages, to see more details about it you can check the CRaSH documentation. So with Spring Boot you have a very powerful framework that can help you creating production ready Spring applications without spending time in complex configurations. It is also possible to include sets of technologies grabbing just one simple dependency thanks to its starters, and last but not least Spring Boot helps to monitor the application by providing useful endpoints and a remote shell to run default or custom commands. It is a framework that covers from bootstrapping to monitoring of the applications.