Data Enrichment with Logstash's Elasticsearch Filter Plugin
Today we are tackling a common problem in IT. You have data that contain unique ids. Many use cases in the Elastic Stack require additional data.
This blog post provides an example of how to enrich data coming from Elasticsearch. As an example, we use events that have an employee id. We want to enrich the data with our employee master data. This is an example, and details are not meant seriously.
Introduction
To keep it simple, the responsibilities of the Elastic Stack products in our post.
- Elasticsearch is our data source. The employee data is stored there.
- Logstash is our data processor. It processes and enriches the data.
- Kibana is the UI window to Elasticsearch. Use the Kibana Console to add and query data.
Data Source
First, I create a simple Employee index. This is the physical storage unit for the data.
PUT employees
{
  "mappings": {
    "properties": {
      "address": {
        "properties": {
          "country": {
            "type": "keyword",
            "ignore_above": 128
          },
          "state": {
            "type": "keyword",
            "ignore_above": 32
          },
          "street": {
            "type": "text"
          },
          "zip": {
            "type": "keyword",
            "ignore_above": 8
          }
        }
      },
      "competence": {
        "properties": {
          "name": {
            "type": "keyword",
            "ignore_above": 256
          },
          "score": {
            "type": "long"
          }
        }
      },
      "id": {
        "type": "long"
      },
      "name": {
        "properties": {
          "firstName": {
            "type": "keyword",
            "ignore_above": 256
          },
          "fullName": {
            "type": "text"
          },
          "lastName": {
            "type": "keyword",
            "ignore_above": 256
          }
        }
      },
      "title": {
        "type": "keyword",
        "ignore_above": 256
      },
      "beverage": {
        "type": "keyword",
        "ignore_above": 16
      }
    }
  }
}
Add Data
Now we put some example data, not accordingly right. The first employee, a total Elasticsearch newbie.
PUT employees/_doc/42
{
  "id": 42,
  "name": {
    "firstName": "Vinh",
    "lastName": "Nguyen",
    "fullName": "Vinh Nguyen"
  },
  "address": {
    "street": "16105 Brookhurst Ave",
    "zip": "92708",
    "state": "CA",
    "country": "US"
  },
  "title": "Junior Engineer",
  "competence": [
    {
      "name": "Elasticsearch",
      "score": 6
    },
    {
      "name": "Java",
      "score": 5
    },
    {
      "name": "Apache Kafka",
      "score": 5
    },
    {
      "name": "PostgreSQL",
      "score": 3
    },
    {
      "name": "K8S",
      "score": 3
    },
    {
      "name": "Docker",
      "score": 3
    },
    {
      "name": "Python",
      "score": 3
    }
  ],
  "beverage": "beer",
  "dance-move": "hip and happy"
}
The second employee, a Spring Boot Cloud Crypto Currency Big Data Flow IoT Blockchain Expert (should contain all current trending words :-).
PUT employees/_doc/78
{
  "id": 78,
  "name": {
    "firstName": "Patrick",
    "lastName": "Dobler",
    "fullName": "Patrick Dobler"
  },
  "address": {
    "street": "Spring Allee 12",
    "zip": "3000",
    "city": "Bern",
    "state": "BE",
    "country": "CH"
  },
  "title": "Senior Architect",
  "competence": [
    {
      "name": "Spring Mircro-Services",
      "score": 6
    },
    {
      "name": "Java",
      "score": 6
    },
    {
      "name": "Angular",
      "score": 5
    },
    {
      "name": "Node.js",
      "score": 6
    }
  ],
  "beverage": "coffee",
  "dance-move": "Pasodoble"
}
Query Data
Use this in the Kibana Console to query the Elasticsearch index.
GET employees/_search
{
  "query": { "match": { "id": 42 } }
}
If you follow the example, you get this result:
{
  "took" : 0,
  "timed_out" : false,
  "_shards" : {
    "total" : 1,
    "successful" : 1,
    "skipped" : 0,
    "failed" : 0
  },
  "hits" : {
    "total" : {
      "value" : 1,
      "relation" : "eq"
    },
    "max_score" : 1.0,
    "hits" : [
      {
        "_index" : "employees",
        "_type" : "_doc",
        "_id" : "42",
        "_score" : 1.0,
        "_source" : {
          "id" : 42,
          "name" : {
            "firstName" : "Vinh",
            "lastName" : "Nguyen",
            "fullName" : "Vinh Nguyen"
          },
          "address" : {
            "street" : "16105 Brookhurst Ave",
            "zip" : "92708",
            "state" : "CA",
            "country" : "US"
          },
          "title" : "Junior Engineer",
          "competence" : [
            {
              "name" : "Elasticsearch",
              "score" : 6
            },
            {
              "name" : "Java",
              "score" : 5
            },
            {
              "name" : "Apache Kafka",
              "score" : 5
            },
            {
              "name" : "PostgreSQL",
              "score" : 3
            },
            {
              "name" : "K8S",
              "score" : 3
            },
            {
              "name" : "Docker",
              "score" : 3
            },
            {
              "name" : "Python",
              "score" : 3
            }
          ],
          "beverage" : "beer",
          "dance-move" : "hip and happy"
        }
      }
    ]
  }
}
Data Enrichment with Logstash
After we have the data in our employees index, we will use Logstash for the demonstration.
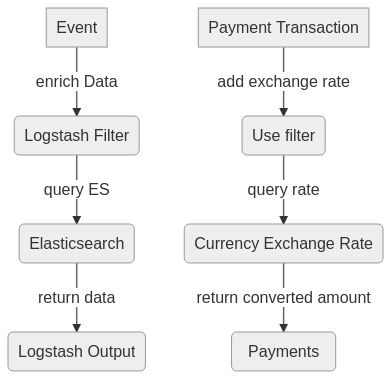
Logstash always has this pipeline structure:

Create a Logstash configuration named test.conf.
Input
Input is just the standard input from our shell. We expect the data to be JSON encoded.
input {
  stdin { codec => "json" }
}
Filter
We use a Logstash Filter Plugin that queries data from Elasticsearch. Don't be confused, usually filter means to sort, isolate. Think of a coffee filter like the post image. Filter in a Logstash terminology means more a transitive change to your data. This can be reducing or adding data. In our case, it is enriching (adding) data.
The Elasticsearch Filter Plugin allows us to query the master data.
filter {
  elasticsearch {
    hosts => ["http://localhost:9200"]
    index => "employees"
    query_template => "query-template.json"

    fields => {
        "beverage" => "favorite"
        "[name][fullName]" => "name"
        "competence" => "talents"
    }
  }
  mutate {
    add_field => { "top-skill" => "%{[talents][0][name]}"  }
  }
}
- We limit the index to
employees. Imagine you have an Elasticsearch Cluster with hundreds of indices. Neither cool or performant to hit every index with the query. - We use a query template named
query-template.json. - The
fieldscontains the additional information we would like to have in Logstash. There is some explicit mapping.beveragebecomesfavorite.- We want the
fullnameof the JSON propertyname. - The
competenceJSON array is renamed totalents.
- The mutate filter adds the field
top-skillfrom the newtalentsarray.
The query-template.json contains above Elasticsearch query. We use the Logstash variable %{[id]} in this template.
{
  "size": 1,
  "query": { "match":{"id": %{[id]} } }
}
Output
The output is the standard output of our shell.
output {
  stdout { codec => "rubydebug" }
}
Testing Data Processing
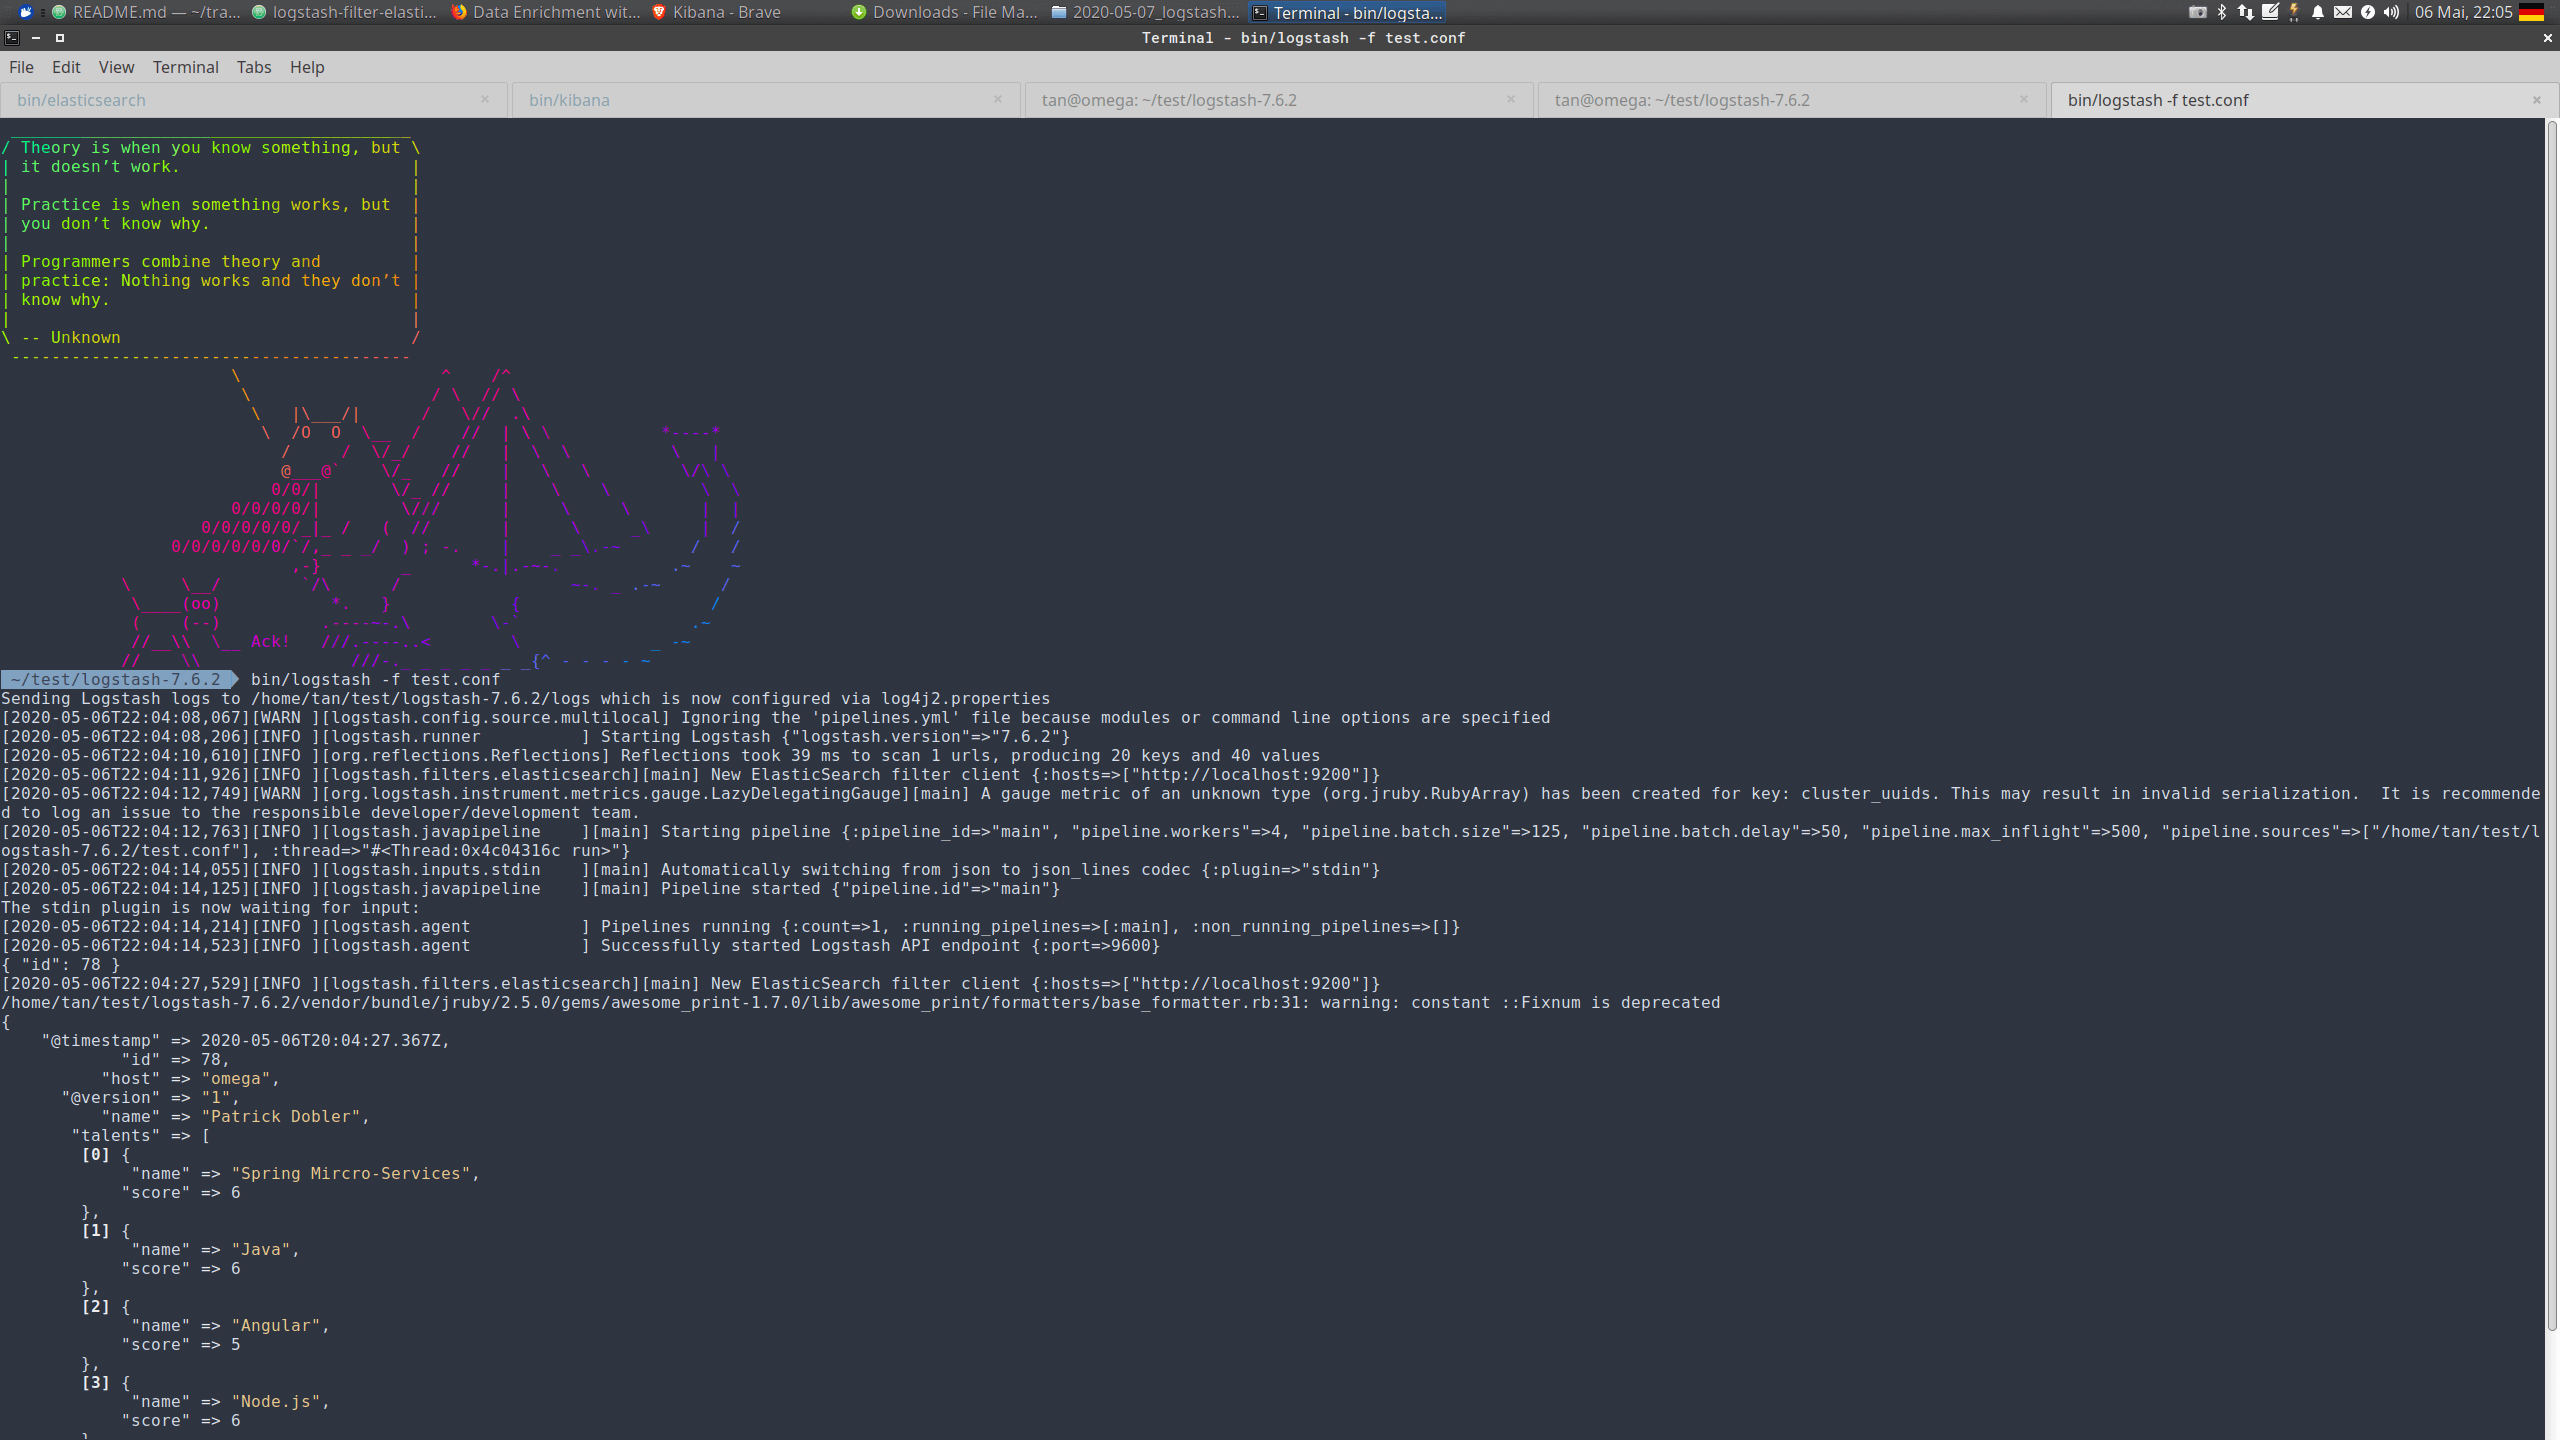
Start Logstash with the configuration (as seen below in screenshot).
bin/logstash -f test.conf

In the end you should see the last message after successful start.
[2020-05-06T17:09:56,323][INFO ][logstash.agent ] Successfully started Logstash API endpoint {:port=>9600}
Now enter in the console following data:
{ "id": 42 }
Logstash returns the data retrieved from Elasticsearch.
{
      "favorite" => "beer",
     "top-skill" => "Elasticsearch",
       "talents" => [
        [0] {
             "name" => "Elasticsearch",
            "score" => 6
        },
        [1] {
             "name" => "Java",
            "score" => 5
        },
        [2] {
             "name" => "Apache Kafka",
            "score" => 5
        },
        [3] {
             "name" => "PostgreSQL",
            "score" => 3
        },
        [4] {
             "name" => "K8S",
            "score" => 3
        },
        [5] {
             "name" => "Docker",
            "score" => 3
        },
        [6] {
             "name" => "Python",
            "score" => 3
        },
        [7] {
             "name" => "Zombie Apocalypse",
            "score" => 6
        }
    ],
          "host" => "omega",
      "@version" => "1",
          "name" => "Vinh Nguyen",
            "id" => 42,
    "@timestamp" => 2020-05-06T18:31:15.035Z
}
If you repeat for the second employee:
{ "id": 78 }
The enriched output:
{
      "favorite" => "coffee",
     "top-skill" => "Spring Mircro-Services",
       "talents" => [
        [0] {
             "name" => "Spring Mircro-Services",
            "score" => 6
        },
        [1] {
             "name" => "Java",
            "score" => 6
        },
        [2] {
             "name" => "Angular",
            "score" => 5
        },
        [3] {
             "name" => "Node.js",
            "score" => 6
        }
    ],
          "host" => "omega",
      "@version" => "1",
          "name" => "Patrick Dobler",
            "id" => 78,
    "@timestamp" => 2020-05-06T18:33:18.810Z
}
Summary
The Elastic Stack provides with Logstash and Elasticsearch robust solutions for dealing with data.
Logstash filters have versatile usage. In our example, we enrich data from master data.
This can work with any additional scenario. Think of payment transactions, that need converted currency amounts.

If you have for search reason your master data in Elasticsearch, you can easily enrich it, if you need to.