Docker with Liferay DXP
What is docker?
Docker containers wrap a piece of software in a complete filesystem that contains everything needed to run: code, runtime, system tools, system libraries – anything that can be installed on a server. This guarantees that the software will always run the same, regardless of its environment.
There are so many advantages using Docker, one for example is that the new members in a development team can easily build a local environment without spend a lot of time. With this in mind, this article shows how to build a MySQL and Liferay DXP development environment with Docker.
Cheatsheet
This text was written with the idea that the reader knows about how Docker works, despite this I wrote you a brief reminder.
Image
A Docker image is a read-only template with instructions for creating a Docker container
Container
A Docker container is a runnable instance of a Docker image
Dokerfile
A docker image is described in text file called a Dockerfile, which has a simple, well-defined syntax
Docker-compose
A tool for defining and running multi-container Docker applications.
Commands
build
Build an image from a Dockerfile
tag
Tag an image into a repository
pull
Pull an image or a repository from a Docker registry
push
Push an image or a repository to a Docker registry
run
Run a command in a new container
Creating Docker Containers
Data base
As I said, we are going to use mySql as data base in our project. We can download a mySql image from hub.docker.com.
Executing this command line
docker run --name articleDatabase -p 3306:3306 -e MYSQL_ROOT_PASSWORD=admin -e MYSQL_USER=lportal -e MYSQL_PASSWORD=lportal -e MYSQL_DATABASE=lportal -d mysql:5.7
We get a mySql server, inside a Docker container named articleDatabase, running in localhost:3306. If is required we can connect to the server (lportal as user and password) for data import, execute scripts, alter tables...

Liferay DXP
For creating our Liferay image we can download a clean image of Ubuntu, and manually install java, Liferay DXP, deploy some portlets… or we can use a dockerfile.
We're not going to create a dockerfile from scratch, we're going to use one created by Christian Toncelli. The file was created for working with Lifeay CE bundles, in order to use it with Liferay DXP we must edit it.
Download the project from github
The project is stored in Github, so we must download it. Because in the trunk is the 6.2 version, we must download 7.0 branch, where is the last version of Liferay.
git clone -b 7.0 --single-branch https://github.com/ctliv/docker-liferay-mysql.git
Now we have in our directory something like this
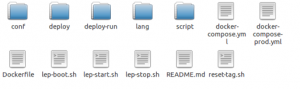
Configuration port-ext files
Inside the conf folder we have the configurations files, in this files is where data base configuration is placed.

As you can see, the database configuration is using localhost:33006, which is the container we started earlier.
Deploy portlets
At the time the image is built, we can deploy some portlets. For doing this, we must copy them into the deploy folder.
Dockerfile
The file named Dockerfile, contains the instruction to build a Liferay image from scratch. This means that using a clean Ubuntu image, Docker will install java and a clean Liferay 7 bundle.
FROM ubuntu:xenial
MAINTAINER Cristiano Toncelli <ct.livorno@gmail.com>
# Users and groups
# RUN groupadd -r tomcat && useradd -r -g tomcat tomcat
RUN echo "root:Docker!" | chpasswd
# Install packages
RUN apt-get update && \
         apt-get install -y curl unzip ssh vim net-tools git && \
         apt-get clean
# Export TERM as "xterm"
RUN echo -e "\nexport TERM=xterm" >> ~/.bashrc
# Install Java 8 JDK
RUN apt-get update && \
    apt-get install -y openjdk-8-jdk && \
         apt-get clean
ENV JAVA_HOME=/usr/lib/jvm/java-8-openjdk-amd64
ENV JRE_HOME=$JAVA_HOME/jre
ENV PATH=$PATH:$JAVA_HOME/bin
# ...
We must change somethings in order to use Liferay DXP, from this
# Install liferay (removing sample application "welcome-theme")
ENV LIFERAY_BASE=/opt
ENV LIFERAY_DIR=liferay-ce-portal-7.0-ga3
ENV LIFERAY_HOME=${LIFERAY_BASE}/${LIFERAY_DIR}
ENV TOMCAT_DIR=tomcat-8.0.32
ENV TOMCAT_HOME=${LIFERAY_HOME}/${TOMCAT_DIR}
RUN cd /tmp && \
         curl -o ${LIFERAY_DIR}.zip -k -L -C - \
         "https://sourceforge.net/projects/lportal/files/Liferay%20Portal/7.0.2%20GA3/liferay-ce-portal-tomcat-7.0-ga3-20160804222206210.zip" && \
         unzip ${LIFERAY_DIR}.zip -d /opt && \
         rm ${LIFERAY_DIR}.zip && \
         rm -fr ${TOMCAT_HOME}/webapps/welcome-theme && \
         mkdir -p ${LIFERAY_HOME}/deploy && \
         mkdir -p ${LIFERAY_BASE}/script
To this:
# Install liferay (removing sample application "welcome-theme")
ENV LIFERAY_BASE=/opt
ENV LIFERAY_DIR=liferay-dxp
ENV LIFERAY_HOME=${LIFERAY_BASE}/${LIFERAY_DIR}
ENV TOMCAT_DIR=tomcat-8.0.32
ENV TOMCAT_HOME=${LIFERAY_HOME}/${TOMCAT_DIR}
RUN cd /tmp && \
         curl -o ${LIFERAY_DIR}.zip -k -L -C - \
         "http://private.mimacom.com/liferay/liferay-dxp.zip" && \
         unzip ${LIFERAY_DIR}.zip -d /opt && \
         rm ${LIFERAY_DIR}.zip && \
         rm -fr ${TOMCAT_HOME}/webapps/welcome-theme && \
         mkdir -p ${LIFERAY_HOME}/deploy && \
         mkdir -p ${LIFERAY_BASE}/script
What we changed are the url to download the Liferay DXP version and some words (tomcat folder, Liferay folder).
In order to build the image we must execute this command
docker build –t liferayArticle
Now we have a docker image in our computer, for running this image:
docker start liferayArticle
Creating images
At this point we have the development environment running locally (one container with the database and one container with Liferay DXP). The next big step is upload those to mimacom's server.
Execute this instructions for create the tags versions of the containers:
docker tag liferayArticle docker.mimacom.com/liferayArticle:1
docker tag articleDatabase docker.mimacom.com/articleDatabase:1
Because we're not going to upload the images to Docker's hub we must write mimacon's repository address. Keep in mind that in this example the port is not written.
This is the first version, so we use 1 as tag version. During the development process it's possible that you need to upload new versions, for doing this you must change the version of the tag.
To upload the tags to the sever, the commands are:
docker push docker.mimacom.com/liferayArticle:1
docker push docker.mimacom.com/articleDatabase:1
That's all, the two images are available in mimacom's repository (docker.mimacom.com), where everyone can download them.
Note: When your images are uploaded to hub.docker.com you must write your user and password, the reason that I don't do this is because I created an insecure Docker repository.
Create docker-compose file
For using easily our images, we are going to create a docker-compose file.
liferayArticle:
  image: docker.mimacom.com/liferayArticle:1
  container_name: liferayArticle
  dns:
  - 8.8.8.8
  - 8.8.4.4
  environment:
  - LIFERAY_DEBUG=1
  - VM_HOST=vm-default
  ports:
  - "2222:22"
  - "1099:1099"
  - "80:8080"
  - "443:8443"
  - "8999:8999"
  volumes:
  - ./deploy-run:/var/liferay/deploy
  links:
  - "articleDatabase "
dbArticle:
  image: docker.mimacom.com/articleDatabase:1
  container_name: articleDatabase
  dns:
  - 8.8.8.8
  - 8.8.4.4
  ports:
  - "3306:3306"
  environment:
  - MYSQL_ROOT_PASSWORD=adminpwd
  - MYSQL_USER=lportal
  - MYSQL_PASSWORD=lportal
  - MYSQL_DATABASE=lportal
Everyone who used this file, creates a development environment in minutes (obviously depends on your network and sever).
Using our docker-compose file
We must configure the docker-compose file before using it because some configurations are different between users.
The most important thing is the volume, which is the folder shared between container and the system operative.
For example, in my windows environment I configured the volume as
volumes:
  - c:\Projecs\Article\bundles\deploy:/var/liferay/deploy
This means, that every war I copy in c:\\Projects\\Article\\bundles\\deploy is going to be deployed in my Liferay DXP container.
In order to use it, we executed this commands in the directory where there is
docker-compose up –d
docker-compose down